This Aldi sourdough bread copycat recipe has the benefits of fermentation without the addition of whole wheat flour. This is our speciality select sourdough bread Aldi copycat recipe. Combining bread flour and all purpose flour, this loaf will convert anyone to a sourdough bread lover!
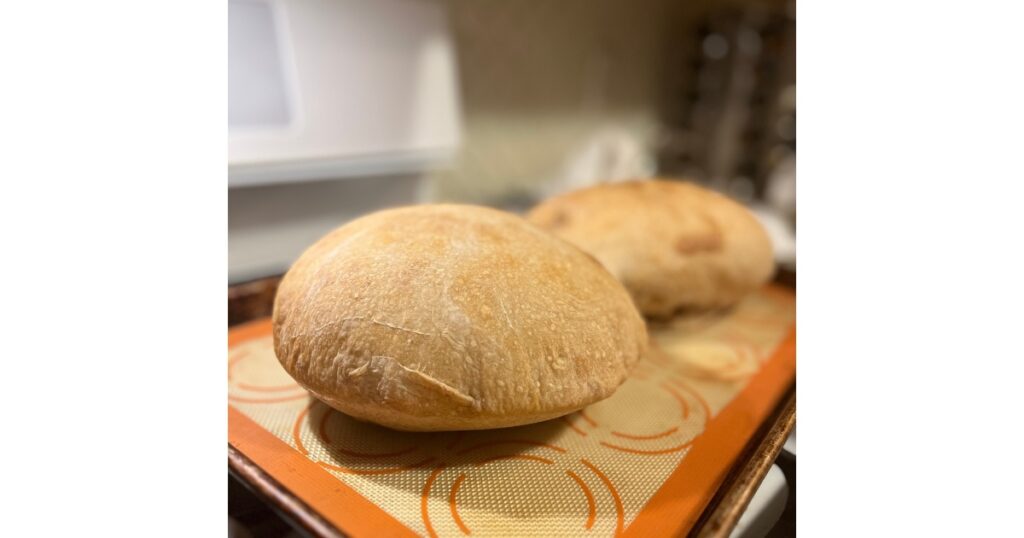
Sourdough bread is a constant staple within our household and one sourdough recipe we love to teach others how to make! If you have ever had the ‘Specialty Selected Sourdough Bread Round’ from Aldi’s, this is a wonderful Aldi sourdough bread copycat recipe.
It is about as ‘white’ of a sourdough bread recipe you will find. And boy, is it delicious.
While we love a good crusty sourdough bread or whole wheat bread, this recipe is not one of them. It has a soft exterior which creates a slight crunch when toasted. Plus this recipe is a sourdough bread open bake, meaning no Dutch oven is required!
Because this sourdough bread has no Dutch oven needed, it can be made on a sheet pan. Therefore, you will not have a sharp edge of an artisan sourdough bread with this loaf. And did we mention it has all the air pockets we love and adore?
Why we love this sourdough bread
There are many reasons to love this Aldi sourdough bread recipe.
Firstly, this Aldi sourdough bread copycat recipe does not require a dutch oven / cast iron bread oven and can be made directly on a sheet pan with a sheet of parchment paper.
Secondly, it does not require use of a bread maker or stand mixer. It truly is a simple homemade bread recipe which will be your go to recipe for a long time!
Additionally, this bread grills up well, is delicious as toast, avocado toast, and french toast, as well as croutons or even garlic bread. It truly is a simple homemade bread recipe which will be your go-to recipe for a long time!
Finally, to one up Aldi’s sourdough bread, this homemade sourdough bread does not contain ingredients and preservatives like Calcium Sulfate, Enzymes or Ascorbic Acid. Because this bread is fermented, the length of time it ferments increases the amount of ‘sour’ flavor.
(As a bonus, by combining only four ingredients: flour, water, salt and sourdough starter, this bread recipe comes together from prep to table within 24 hours.)
Tools You May Need
The supplies are minimal for sourdough bread.
- Large mixing bowl
- Medium sized bowl or banneton basket (for fermenting)
- Tea tea towel, kitchen towel, plastic wrap or beeswax wrap
- Silicone baking sheet or parchment paper
- Kitchen Scale
- Cookie Sheet
Aldi Sourdough Bread Ingredients
Flour – We like the King Arthur Brand (specifically organic and unbleached) or the Kirkland Organic Flour. We use two types of flour within this loaf to create a crispy exterior and a soft, delicate crumb – bread flour and all purpose flour (white flour).
Salt – We prefer to use Pink Himalayan Sea Salt due to the additional nutrients.
Water – We have a reverse osmosis system for our water. If you have city water, consider utilizing filtered water for best results.
Sourdough Starter – Making a sourdough starter from scratch is easy (or get some from a friend nearby!)
Baker’s Schedule
The schedule for baking sourdough bread is highly variable based on the temperature of your environment, the strength of your starter and the amount of ‘sour’ you want your loaf to be.
If you maintain your sourdough starter within the fridge, remove it long enough to allow starter to come to peak hydration before adding to the dough. For our home, this can take anywhere from 8-12 hours depending on the time of year (temperature of the home).
If it is maintained on the counter (room temperature), it may take 4-8 hours depending on the time of year (again, temperature of the home).
Because we maintain a small sourdough starter, we add 3.5 ounces of flour and 3.5 ounces of water to our starter. This allows our starter to build to 7 ounces total and leaves us with our minimal sourdough starter of 1-2 ounces.
The baking schedule below is an example within a household with a temperature of 70 degrees.
First Day:
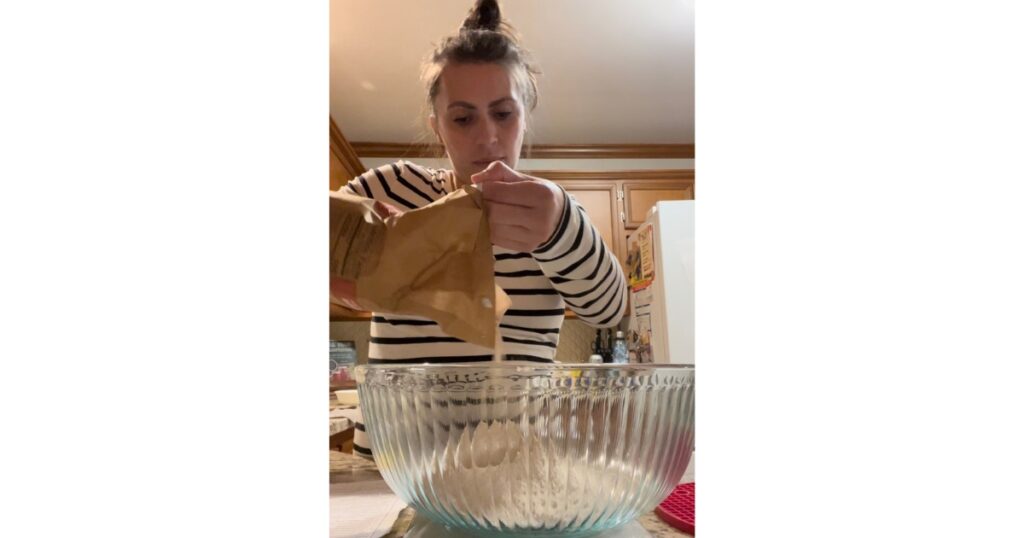
9:00 AM – In a large bowl, mix water and flour together to begin autolayse process. Allow mixture to rest for 30 minutes. Autolayse allows bread to give the flour time to hydrate and begins the process of gluten formation. Additionally, this cuts down on the amount of time needed to stretch and fold the sourdough bread.

9:30 AM – Add salt and sourdough starter to the water and flour mixture. Using your hands or a stand mixer, knead for 5-8 minutes. If kneading bread by hand, you will no longer feel the salt granules in your bread. Allow to rest, covered with a rung out tea towel which is placed over the top of the bowl for 15 minutes.

9:45 AM – Begin the first series of stretch and folds. Starting on one side, stretch and fold the dough a total of four times, turning the bowl a quarter (1/4) circle each time you complete this step. Replace damp towel over bowl and allow to rest for 15 minutes.

10:00 AM – Complete second set of four (4) stretch and folds. After stretching and folding four (4) times, replace tea towel over bowl and allow to rest for 30 minutes.
10:30 AM – Complete an additional set of four (4) stretch and folds. After stretching and folding, replace the tea towel and allow bread to rest for final 30 minutes.

11:00 AM – Finally, complete the last set of four (4) stretch and folds. At this point, the dough should have gained some tension. The dough will not be as pliable as the first stretch and fold. Once the stretch and folds are complete, replace the tea towel and allow to rest on the countertop until the dough has doubled in size (about 12-24 hours).

8:00 – 9:00 PM – Once bread dough has doubled in size, remove from the large bowl on a clean countertop surface. Using a dough cutter, cut the dough in half. Tuck the corners of the dough under the bread, towards the center to create a circular loaf.

Allow to rest on the counter for 20 minutes. This will create a (barely noticeable) film across the dough which will help prevent it from sticking to a tea towel.
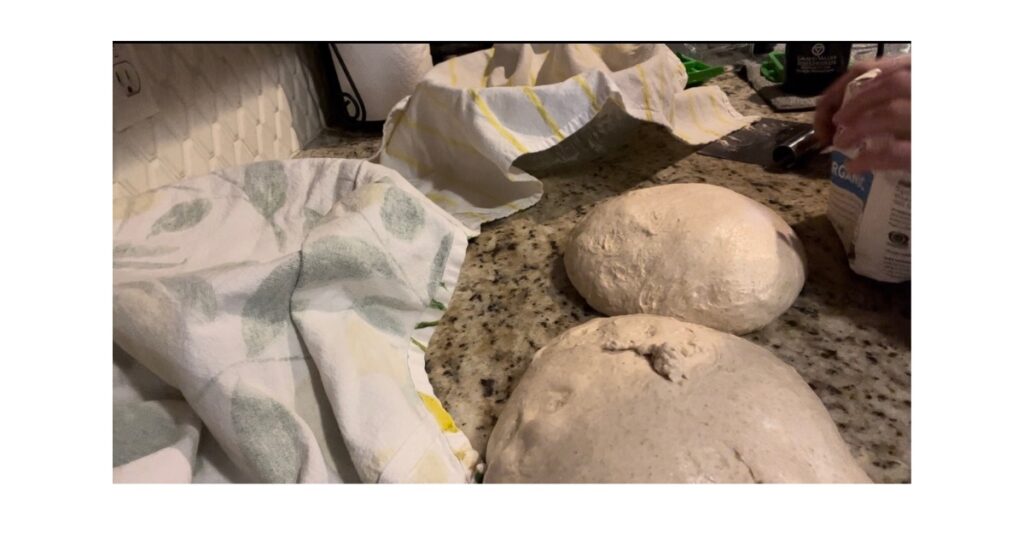
Next, line two bowls with a dry tea towel. Lightly flour the inside of the tea towel. Once the dough has rested on the countertop, use the dough cutter to pick up the loaf and place it within the bowl.
Cover the dough with the tea towel. Place plastic wrap or a beeswax wrap over top of the bowl before placing in the fridge for the long bulk fermentation.
8:30 – 9:30 PM – Finally, place dough bowls within the refrigerator overnight or up to 48 hours after initial bulk fermentation period. The longer the fermentation period within the refrigerator, the more pronounced the sourdough flavor will be.
The Next Day (or up to 36 hours after initial bulk)

8:00 AM (Day of Bake) – Preheat oven to 425 degrees. Remove bread from refrigerator right before baking and place on a sheet pan.
Cook until the dough has a golden brown color (about 30-45 minutes). The dough will be firm to the touch and will become softer on the outside as it cools. Ensure the bread has reached an internal temperature of 190-200 degrees.
8:30 AM (Day of Bake) – Finally, remove bread from oven and allow to cool on a cooling rack. If you decide you want a hot, fresh slice of bread, note the remainder of the bread may dry out slightly as it sits due to the heat escaping quickly.
If you wait for the delicious bread to cool, slice and serve with butter, peanut butter, and even honey or jam!

Storage
Sourdough bread can stay on the counter for up to 7 days before it should be placed within the refrigerator. We prefer placing it in the fridge within 3 days if we have sliced into the loaf to prevent it from drying out.
It can be sliced or placed whole into the fridge or freezer. When placed in the freezer it can last for up to 3-6 months.
Frequently Asked Questions
Does sourdough bread have yeast?
Because sourdough culture is made from natural and active yeasts living within the air, it does not require additional store bough yeast. Additionally, the sourdough culture helps to replace store bought yeast which helps to make the bread rise.
Baking sourdough bread can have varied results due to the strength of a sourdough starter, though an active starter will do the trick.
How to make tangy sourdough bread?
To make this sourdough bread tangy, allow it to ferment in the refrigerator for a longer period of time. This allows the bulk fermentation to occur longer, without allowing it to over ferment. Because of the cooler temperature of the refrigerator, this sourdough bread will become more sour as it sits.
Is it cheaper to make sourdough bread at home?
It is cheaper to make your own sourdough bread from scratch! Where a Aldi Sourdough Bread can range from $3-4, it costs less than $1 to make at home (even if the flour is organic!).

Aldi Sourdough Bread Copycat Recipe
Equipment
- 2 mixing bowl
- 1 Sheet Pan
Ingredients
- 10 ounces Bread Flour
- 23.4 ounces All Purpose Flour
- 23 ounces Water
- 7 ounces Sourdough Starter At mature / peak Hydration
- 0.7 ounces Salt Kosher, Sea Salt or Himalayan Sea Salt
Instructions
Autolayse and Mixing dough
- In a large bowl, mix together flour and water. Allow to sit for 30 minutes (autolayse).
- To the flour and water mixture, add sourdough starter and salt. Knead until salt is dispersed throughout dough and is not felt while kneading. This process can take anywhere from 4-8 minutes. Cover with a rung out tea towel or cloth. Allow to rest in 15 minutes.
Stretch and Folds
- After 15 minutes, remove tea towel or cloth from bowl. Stretch and fold four times. Place tea towel or cloth on top of bowl. Allow to rest for 15 more minutes. Repeat the stretch and fold process once more and allow to rest for 30 minutes.After 30 minutes, remove cloth from dough. Stretch and fold four times. Allow to rest for 30 minutes. Repeat stretch and fold process once more. Place run and allow to rest for bulk fermentation on countertop.The stretch and fold process will be in the following increments (minutes):15-15-30-30
Bulk Fermentation (Countertop)
- Allow to ferment in the large bowl on the countertop until dough has doubled in size. This can take anywhere from 6 hours to 18 hours depending on the temperature of your home.
Cut, Shape and Bulk Ferment (Fridge)
- After the dough has doubled in size, remove from the bowl and place on the countertop. Cut the dough into two, taking care not to pop too many bubbles! Shape the dough by pulling towards you and tucking the edges. This will create a circular loaf. Line two bowls with a dry tea towel or cloth. Lightly flour the surface and place one loaf in each bowl. Wrap dough with towel or cloth and cover. Place within the refrigerator for up to 48 hours.See notes on bulk fermentation time in fridge.
Baking
- Preheat oven to 425 degrees. Line a baking sheet with parchment paper or a silicone baking sheet. Remove loaves from fridge immediately prior to baking. Place on parchment paper or silicone baking sheet and cook for 30-45 minutes. Crust will become golden brown and loaves will be firm to the touch.Ensure the bread reaches an internal temperature of 190 – 200 degrees to be cooked through. As the bread cools, the crust will become less firm.Allow to cool on countertop before cutting. Place cut loaf on cut side down to store, or slice and place in the fridge / freezer for long term storage. If storing on counter, store in a bread bag or plastic bag with corner cracked.Bread will last for up to 1 week on the counter or 3 months in the freezer.
Notes
What is your favorite topping for sourdough bread? Our current favorite is bread and chocolate sprinkles. Let me know in the comments below!




2 Comments